Wednesday, December 16, 2009

Dark Chocolate Brownies


I will let myself eat these... oh, maybe twice a year. And, since I made two batches of these heavenly brownies in one week, I'm done for 2009 and a good portion of 2010.

Dark Chocolate Brownies
from Craving Chronicles

½ c unsalted butter
1 c sugar
2 eggs
3/4 cups 100% dark cocoa
½ t salt
½ t baking powder
½ T vanilla extract
¾ c all-purpose flour
1 c dark chocolate chips


Preheat the oven to 350°F. Lightly grease a 8″ x 8″ pan.

Melt the butter in a saucepan over low heat. Remove from heat and add the sugar, stirring to combine. Return the butter mixture to the heat briefly, just until it’s hot, but not bubbling.

In a smaller bowl, crack 2 eggs and beat them with the cocoa, salt, baking powder, and vanilla until smooth.

Stir the hot butter mixture into the egg mixture until smooth.

Stir in the flour until just combined. Let the batter cool in the bowl for about 20 minutes before stirring in the chips. Allowing the batter to cool keeps the chips intact instead of melting into the batter.

Pour the batter into a lightly greased 8″ x 8″ pan and bake at 350°F for 20-25 minutes, or until a toothpick comes out mostly clean, with some moist crumbs but no loose batter. Cool on a rack before serving.

I served mine with a melon-baller scoop of coconut frozen custard.

These are the best brownies I have ever eaten. The are extremely satisfying. I cut them into small squares and I could easily stop eating after only one brownie. I didn't... But I could.

Friday, December 11, 2009

Pumpkin Spice Cranberry Cake with Orange Frosting and Candied Cranberries


I will make this cake every year for Thanksgiving or Christmas or any other Fall/Winter occasion I can think of. It is showstopping in its beauty and taste. It is easy to make and easily altered for slight variations. Please, please, please make this cake. I know you'll love it, too.

Pumpkin Spice Cranberry Cake with Orange Frosting and Candied Cranberries

1 box spice cake mix
3 eggs, beaten
1 can pumpkin puree
1/3 c milk or water
1 bag of cranberries
2 c water
2 c + 1 c sugar
16 oz cream cheese, room temperature
2 sticks of unsalted butter, room temperature
zest of one large orange
2 t vanilla extract
2 c powdered sugar


Empty the boxed spice cake mix into a large mixing bowl and add three beaten eggs, one can of pumpkin puree, and 1/3 cup of milk (or water). Blend together thoroughly. Empty a bag of cranberries into a colander, rinse and toss out the soft or spoiled berries. Drop 1/4 of the berries in the batter whole, halve another 1/4 of the remaining berries and add them to the batter, as well. Reserve the remaining 1/2 bag of berries to be candied. Stir to combine and divide evenly into two 8 or 9" cake rounds. Bake as directed on the box. What you've got is Spiced Pumpkin Cranberry Cake.


For the frosting take two of the 8oz packages of cream cheese and two sticks of unsalted butter, soften and blend together with the zest of a big orange, 2 t of vanilla and 1 1/2 to 2 cups of powdered sugar, adding the sugar 1/2 cup at a time. Once the cakes are completely cooled, frost with your delicious orange frosting.

For the candied berries dissolve 2 cups of sugar in 2 cups of water in a saucepan. Once the sugar is dissolved, remove from the heat and allow to cool for a minute. Drop a cranberry in the syrup. If after 30 seconds or so the berry does not burst, then the solution is cool enough. Drop all the remaining berries, about half of a bag, in the sugar water. Then cover them with a plate or bowl that is almost the same size as the pan. It should just act like a weight to hold the berries underwater. If one or two pop up over the bowl, don't worry about it. Now let the berries absorb the sugar until the whole shebang is completely cool or overnight. Once cool, remove the berries with a slotted spoon and place them on a some wax paper or foil. Quickly, while they are still wet, sprinkle them with remaining cup of sugar. Once they are dry put them on your cake. PuhPow! Candied Cranberries.

The cake I made for Thanksgiving was a delicious variation of this cake. It started with a boxed white cake mix. I added the three beaten eggs, replaced the water called for on the back of the box with whole milk, and replaced the oil with melted butter. The batter was thick. I added the berries, baked and decorated as in the recipe above. It was perfect.

I hope you enjoy this cake as much as I do!

Tuesday, July 14, 2009

Baker's Instincts

This weekend I tried to make a Red Velvet Cake for a friend's birthday. It was not very successful. In the end, the entire experience taught me that have some fledgling baker's instincts, and that next time around I should trust them.

When I started my search for a recipe I had the idea that I should find the most authentic recipe out there. I don't know why exactly, but it seemed like such a specific cake steeped in tradition. I didn't want to make a simple knock off. I was going to go for the glory. After looking some recipes over, I found the more traditional versions had some ingredients I was unsure of. The idea of adding vinegar to a cake just seemed unappealing. I also saw that the older, more traditional recipes called for only two tablespoons of cocoa powder, while the newer ones had a quarter cup or more. Here's where those instincts made their first appearance. Just looking at the recipes, the newer versions looked better to me. My instincts said, "Just go with what looks better." But, I ignored them and continued down the path of tradition and authenticity.

As I continued to read about Red Velvet Cakes, I learned a bit of lore about them. There are plenty of stories about how the red cakes came about, but the one that stood out to me as the most likely was one about poor folks in the South. In the 1940's when chocolate cakes were in fashion, but cocoa powder was expensive and hard to come by, some creative bakers came up with a colorful alternative to a white or yellow cake. With couple tablespoons of cocoa and a bunch of food coloring, a new tradition with just a dash of the coveted cocoa was born. It sounded like a beautiful tradition of folks making the best of what they had, but again my instinct came into play. They whispered to me, "If this is true, that Red Velvet was the cake you made if you couldn't afford chocolate, and I CAN afford chocolate... Why not just make chocolate?"

"Shut up," I said to my instincts. "Surely Red Velvet (the poor man's chocolate cake) is a special cake that is just as good as chocolate cake (the rich man's chocolate cake)." Why? Why would I say that to myself? The poor man's anything is never as good as the rich man's something!

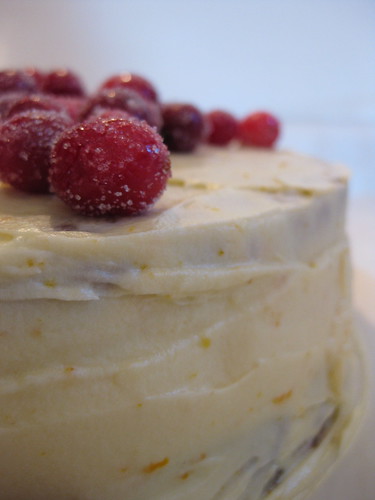
I settled on a recipe that seemed authentic and was detailed and easy to follow. I went out and bought some really choice ingredients and got to work. I carefully measured, sifted and mixed. It was really a fun project to work on. The cakes turned out a brilliant shade of red. I felt at this point very successful.

I let the cake cool overnight. I decided not to go with the traditional roux icing (all of a sudden tradition wasn't important?) and made a cream cheese frosting that was highly recommended on a well respected food blog. The frosting was delicious, however, it was a tad soft. I had followed the recipe carefully, that must be how it's supposed to be, right? Well, I frosted the cake and it looked great for a minute. But only moments later my cake was nearly naked again, sitting in a puddle of frosting. It was just way too soft! I still had plenty of frosting so I added a couple of cups of powdered sugar to the frosting to stiffen it up. I also turned on the air conditioner (it was a little warm in the kitchen) and frosted the cake a second time then quickly put it in the fridge to set. I peeked in after five minutes to check on it and my heart fell. The frosting was still oozing down the side of the cake.

It was such a frustrating experience! I had imagined this creamy, white frosting hiding away a stunning, deep red cake. I kept ending up with a puddle of frosting! After the second frosting attempt, I threw in the towel and made a chocolate ganache that I KNEW would stay on. However, all the frosting drama had left the cake a bit disheveled and I couldn't bring myself to present a messy cake to my friend. I cut him piece and left the rest in my fridge. Finally, three days later, I was able to bring myself to taste it. I let it rest on the counter to come up to room temperature, poured myself a glass of milk, and dug in.

It was surprisingly good! Not great, certainly not as good as a chocolate cake, but good. The cake was a bit grainy, like a corn cake, and not very sweet, but the remnants of the cream cheese frosting and ganache were a nice sweet balance.

In the end, I'm glad I had this baking experience. I learned that, even though I still so new at this, I can trust myself and my instincts.

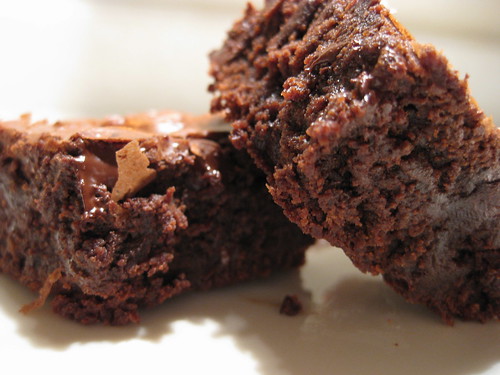
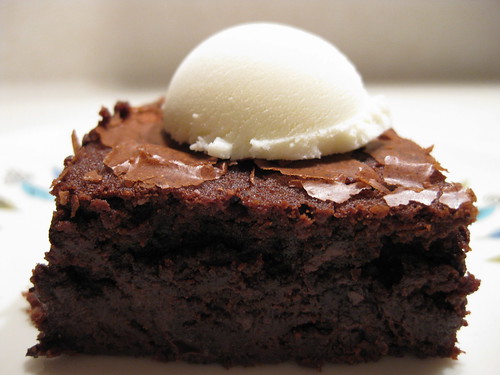
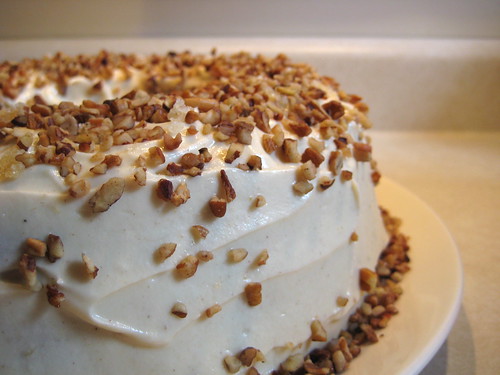
Here's a picture of the cake.

I'm not going to link to the recipe this time, because I really can't recommend it, especially the frosting. If you're interested in baking a Red Velvet cake, you'll have to do your own search. Just remember to trust your instincts!

Wednesday, July 8, 2009

Details...

I just put together some wooden bead curtain tie-backs for my kitchen. Although they are hardly similar, they were inspired by some tie-backs I saw in the West Elm catalog years ago. John and I picked these beads out at the craft store and I strung them up on some nylon wire. Zumi got a hold of one the other night and I came home to a kitchen floor covered with chewed up beads. She seems to have had her fill so, for the moment, the others are safe.

Wood

John and I bought these silicone cutting mats a while back. They seemed like a great idea. They're flexible, easy to clean, and non-porous. They help avoid cross contamination and are stored easily. Perfect, right?


Wrong.

We treated these mats with reasonable care and we washed them by hand as we don't have a dishwasher. This is what we got. Immediately.

The color on the back of the mats easily rubbed off leaving hard to remove marks on our counters.

Avoid these mats, folks. Stick to time-tested wooden cutting boards. We currently have bamboo boards and they certainly do the trick.

Breakfast

We like BIG breakfasts at my house. John has this saying, "Breakfast like a king, lunch like a queen and dinner like a peasant." I think that makes sense but, even if I thought it was rubbish, nowadays I'm always on board for breakfast sweets and savories. There was a time though were I would pass on traditional breakfast foods. I'd take a bowl of cereal, but couldn't stand the though of pancakes. Growing up my dad would make us his favorite breakfast items every Saturday and Sunday. It was eggs (scrambled or omelets), bacon or sausage, pancakes, toast or biscuits, etc. Often they were delivered to us in bed as he was always up so early to get out on the golf course. Anyway, all those years of decadent breakfasts in bed had the unfortunate effect of turning me off of breakfast completely. I was just tired of it. But, after a a few years of a steady breakfast diet of Kashi Go Lean Crunch cereal, a craving for bacon and eggs popped up out of no where. Now, maybe twice a week, we'll take a break from cereal or toast with fruit and have something a little more... hearty!

When we go all out for breakfast it always includes an egg, sunny side up and fried in butter with salt, pepper, thyme, and Romano cheese. It is so rich and delicious. I almost always serve it with some asparagus, lightly seasoned and either steamed, grilled or sauteed. We most commonly have bacon, but occasionally there will be some sausage or ham we need to use up. There is usually toast with butter or Smart Balance and jam. If there is a potato in the pantry I'll chop it up for some home fries, but I'm not too good at frying things, so this is a rare occurrence. I'll throw in whatever fruit we have on hand, usually berries or stone fruit and sometimes mix it into a bowl of Greek yogurt with raw local honey or fat-free cottage cheese. These are all usually served with a glass of juice, milk, tea, coffee or all four! With a breakfast like this, we don't usually have lunch, just a snack to tide us over until dinner.

Healthy Brownies?


I saw this recipe on Spork or Foon? for "healthy brownies." I thought to myself, "Can this be true?" I love deep chocolate, fudgey brownies, but I never make them. For one, I've always been a terrible baker. My out-of-the-box brownies always ended up bland and hard as a rock. I also have a terrible habit of eating far too many than I should (more than one...). With my new found confidence in baking, the idea of a brownie that I could guiltlessly indulge upon was intriguing. Plus, these were certainly talked up over at Spork or Foon. I had the evening free, so decided to give them a try.

Healthy Brownies
from Spork or Foon

1/2 c unsweetened cocoa powder
1/2 c unsweetened applesauce
3 egg whites
1 c sugar
1 t fine sea salt
1 t vanilla extract
1 t instant coffee granules
1/2 c white whole wheat pastry flour
1/4 c chopped walnuts (optional)

Preheat oven to 350 degrees. Spray an individual brownie pan or 8 inch square baking pan, with non-stick cooking spray.

In a large bowl mix together all of the dry ingredients. Mix the applesauce and egg whites and gently fold into the dry mixture. Stir only until moistened.

Pour into prepared pan. Sprinkle with chopped nuts. Bake for 20-25 minutes or until desired texture is reached. Less time will result in a more dense, gooey brownie and longer time will produce a cake like brownie.


These were a major miss. I added chocolate chips in an attempt to make them more tasty. I failed. They are a sad waste of quality ingredients. They tasted like chewy, grainy, chocolatey apple wedges. I might try to make them again, maybe I missed something. For now, though, I'll stick to terribly unhealthy brownies.

Chocolate Chip Cookies

My first attempt at Chocolate Chip Cookies from scratch turned out great. Up until this point I was strictly a ready-made cookie dough kind of girl. But, with my recent baking successes, I was eager to try my hand at this classic cookie. I chose this recipe because it seemed to yield a smaller amount (if I make four dozen cookies, I'll eat four dozen cookies...). The flavors also sounded perfect for this occasion; John had requested a cookie with nuts and I love dark chocolate.

Chocolate Chip Cookies
from Sweet Amandine

1/2 c granulated sugar
1/2 c firmly packed light brown sugar
8 T (1 stick) unsalted butter, cold, cut into 1/2-inch pieces
1 large egg
1 t vanilla
1/2 t baking soda
1 1/4 c flour
1/4 t salt
1 1/2 c dark chocolate chips (I used Whole Foods Dark Chocolate Discs.)

Optional
1 c toasted, finely chopped nuts (I used pecans.)

Adjust the oven rack to the top third of the oven and preheat to 300F. Line two baking sheets with parchment paper.

Beat the sugars and the butter together until smooth. Mix in the egg, vanilla, and baking soda.

Stir together the flour and salt, then mix them into the batter. Mix in the chocolate chips (and nuts).

Scoop the cookie dough into rounded tablespoon balls, and space them at least an inch apart on the baking sheets.

Bake for 18-20 minutes, or until pale golden brown. The cookies will be pretty soft when you remove them from the oven, but will cool to a firmer, chewy consistency.

These cookies were delicious. However, it made me realize that I prefer semi-sweet chocolate chips in my cookies. I missed their traditional sweetness. I thought it was interesting that the cookies were baked at a slightly lower temperature. Maybe that's why the the texture turned out a little more cakey than the cookies I'm used to. I really liked that texture, though, so I'll definitely be making these again.

Ice Cream Cake

This cake recipe is a sure winner. It is incredibly simple and allows even baby bakers like myself come up with intriguing (and gourmet sounding) flavor combinations. I would have never thought I could bake a Caramelized Pear and Ginger Spice Cake or a Lemon Honey Cake with Lavender. This recipe made it all possible!

Ice Cream Cake
from Omnomicon

1 box cake mix (of any flavor)
1 pint ice cream (of any flavor), softened
3 eggs
1 c water

Preheat oven to 350o. Grease and flour a tube or bundt pan.

Beat all ingredients together until well incorporated, pour into pan and bake 45 minutes. Serve with the frosting of your choice.

Flavors that I've tested are Dark Chocolate Cake with Chocolate Ganache, Vanilla Zebra Cake with Chocolate Ganache, Ginger Spice Cake with Maple Cream Cheese Frosting and Pecans, and Lemon Cake with Earl Grey Butter Cream.

Food blogs!

I love looking at food blogs. Several times a day I'll stop by Tastespotting and foodgawker to browse through their tasty looking offerings. For me the draw is seeing what other people are doing in their kitchens, how they shop, add variety, keep it healthy, indulge, etc. It's also about the art, expression through the food and the photography. I call it 'food porn', but it's really more like 'food art'. I bookmark everything that looks especially delicious or easy to make. This practice has gotten me a bookmark folder with literally hundreds of unorganized recipes waiting to be tried. Very slowly I'm starting to try the recipes in my overflowing folder. There have been hits and misses. From now on, both will be shown here.

First: a hit!

I've always been a terrible baker. I've had success cooking, but baking was always a nightmare for me. I could even screw up brownies out of the box. After failure after failure, I had come to terms that baking was just not my thing. Then I made a new friend, Rachel. She gave up a high paying job to go pastry school and pursue her delicious pastry dreams! Her passion for pastry inspired me to give baking another go and I'm so glad I did. My first at bat I hit it out of the park with these beautiful Hot Crossed Buns.


I've heard these are traditionally prepared for Good Friday, but I made these Easter Morning. They were a tradition in John's family growing up and now they can be a tradition for us going forward.

Hot Crossed Buns
adapted from Open Mouth Insert Cookie

Buns
2 1/4 t instant yeast
1/4 c sugar
3/4 c water
3 1/2 c all purpose flour
3/4 c buttermilk
1 large egg, slightly beaten
2 t ground cinnamon
1 t ground nutmeg
1/2 t all-spice
1/4 c butter, room temperature, in tablespoons
1 c dried currents
2 t orange zest

Crosses
3 T all purpose flour
1 t sugar
2 T water

Glaze
1/4 c water
2 T honey
2 T sugar

Icing
1/2 c confectioners sugar
1 T cream cheese, room temperature
1/2 t vanilla
2-3 T milk

In a large mixing bowl, combine all of the ingredients for the dough, except for the currants. Then, with your hands, mix the dough just until it forms a rough ball. Turn it out and knead it on a floured surface until it's smooth and elastic (about 5 minutes). Next, knead in the currants, taking care to distribute it evenly. Place in a lightly greased bowl, cover, and let rise until doubled (about 2 hours).

Turn the dough out onto a floured surface, deflate gently, and form into 16 round buns. Place on a baking sheet lined with parchment, about an inch apart. Snip a cross into the top of each bun with scissors. Cover, and let the buns rise again, until they are 1.5 times larger (about an hour). Preheat oven to 375 degrees. Combine the cross ingredients and stir until smooth. Place in a plastic baggy, and cut a tiny bit of the corner off. Pipe crosses (following the snip marks in your buns) on each bun. Bake until golden brown and firm (about 30 minutes).

To make the glaze I boiled the water and poured it piping hot into a bowl with the sugar and honey. As soon as the buns come out of the oven, brush each with the glaze.

To make the icing, simply combine all of the ingredients in a bowl. Make sure the cream cheese is nice and soft and begin by adding only 2 T of milk. If the icing is too thick, add a third tablespoon. Let the buns cool a little then, using the same plastic baggy piping technique, pipe on the icing.

Enjoy while still warm!

Sunday, May 3, 2009

Sputnik

First things first, I needed a bike. I wasn’t sure, though, about what kind to get or where to get it. Naturally, my first concern over the kind of bike was that the bike not crumple beneath me. I started out googling things like “overweight bike” and “bikes for fat people.” I found forums where there were tons of people expressing their similar fears. Many offered suggestions, but it felt a bit like the blind leading the blind. I decided that finding a good local bike shop with knowledgeable, experienced bikers would be a better place to start. As usual, I turned to Yelp.

Roscoe Village Bikes was highly recommended, their website was well designed and they were just a few blocks from my house. I emailed the shop with some general questions and background info before going in. I needed a bike for everyday use; commuting to work, hauling groceries, and fun. The owner, Lesley, made some suggestions and assured me that my weight was not an issue. Sure, some parts may wear down over time, but a well-crafted bike would carry me just fine. I went in a few days later to take a look at the bikes and maybe test ride a few. At that time I was pretty sure I wanted a steel bike, most likely a hybrid commuter or a flat-bar road bike. Lesley showed me the KHS Urban Xpress, the Jamis Coda, and the Redline 9. They all seemed to meet my needs, but none really stood out to me. I went home with their catalogs, resigned to do some thinking and internet research.

I mulled it over for about a week (or two...), going back to the shop and doing multiple test rides. I spent every spare moment looking through the catalogs and at the manufacturer websites. I began to lean toward the Jamis Coda. Jamis seemed like a good company and all of their bikes looked great. During one visit to the shop, Lesley mentioned they had an ’08 model of the Jamis Satellite Femme, a steel road bike, in my size. I took it out for a spin fully expecting to not like it, but the super thin road tires, the dropped handle bars, the teeny-tiny saddle, they all made for a really fantastic ride. The bike felt so quick and responsive. I realized that while the Xpress, Coda and 9 could all get the job done, what they were missing was the fun. That particular bike had a few cosmetic defects that kept me from purchasing it, but it did lead me to try another Jamis road bike that ended up coming home with me that day.

Behold, the Jamis Sputnik.

Saturday, May 2, 2009

'About me' and LA

A few weeks ago John and I took a short vacation to Los Angeles. We went to see the World Baseball Classic Finals and took a few extra days to see what LA was all about. I was really excited to go to the WBC again and it looked like USA might make it to the finals this year. However, the idea of spending time in LA wasn’t too appealing. All I knew about the city was what I’d seen on TV. Desperate Housewives suburbia, glimpses of hotspots on TMZ, 90210? None of it had any character and, aside from hitting the beach, I couldn’t think of anything to do. So, I turned to Yelp for help. Armed with the recommendations and reviews of fellow Yelpers I dove into our LA vacation and ended up having a blast. In the end, I learned two things about myself on that short trip. The first was that I love riding a bicycle. The second? I want to move to LA.

On our last day there we spent the morning at Santa Monica Beach. John rented rollerblades and I got a beat up, dirty mountain bike for an hour of fun in the sun. We cruised down to Venice Beach in true tourist fashion, taking pictures of ourselves and getting in the way of locals. That hour was incredible, though, because remembering how fun it is to ride a bike inspired tremendous change in my life. As soon as we got home I put my bus pass in the shredder and set out to buy a bike. Without a second thought I became a cyclist. Saving money, living healthier, commuting faster, doing more for my community and the environment; it was all just right for me. I had no idea what I would need or how I was going to do it exactly, but I’d figure it out. I love riding a bicycle.

Winter here in Chicago is sometimes hard to bear. It is brutally cold and it seems to last for six months, give or take a month or so. The winter does have its fleeting moments of beauty. There are a few peaceful minutes when the city is painted white with freshly fallen snow. However, those minutes are usually followed by long weeks of dirty, gray slush and mud. Being able to escape the gray grip of winter and enjoy those few days of warm, green spring in LA was awesome, but it turned out to be a mixed blessing. It was just the break I needed to survive the rest of the winter in Chicago. The downside was that I was hooked. Who needs 60 inches of snow and temps below zero? I want to move to LA.